MAIN OPPORTUNITIES
In this section, you can create and edit service cards. Client requests related to your services will also appear here.
How it works: Create a service, add pricing in the price list, receive requests, and clarify details with the client via any convenient messenger. Use payment links to receive payments.
How to Add a Service
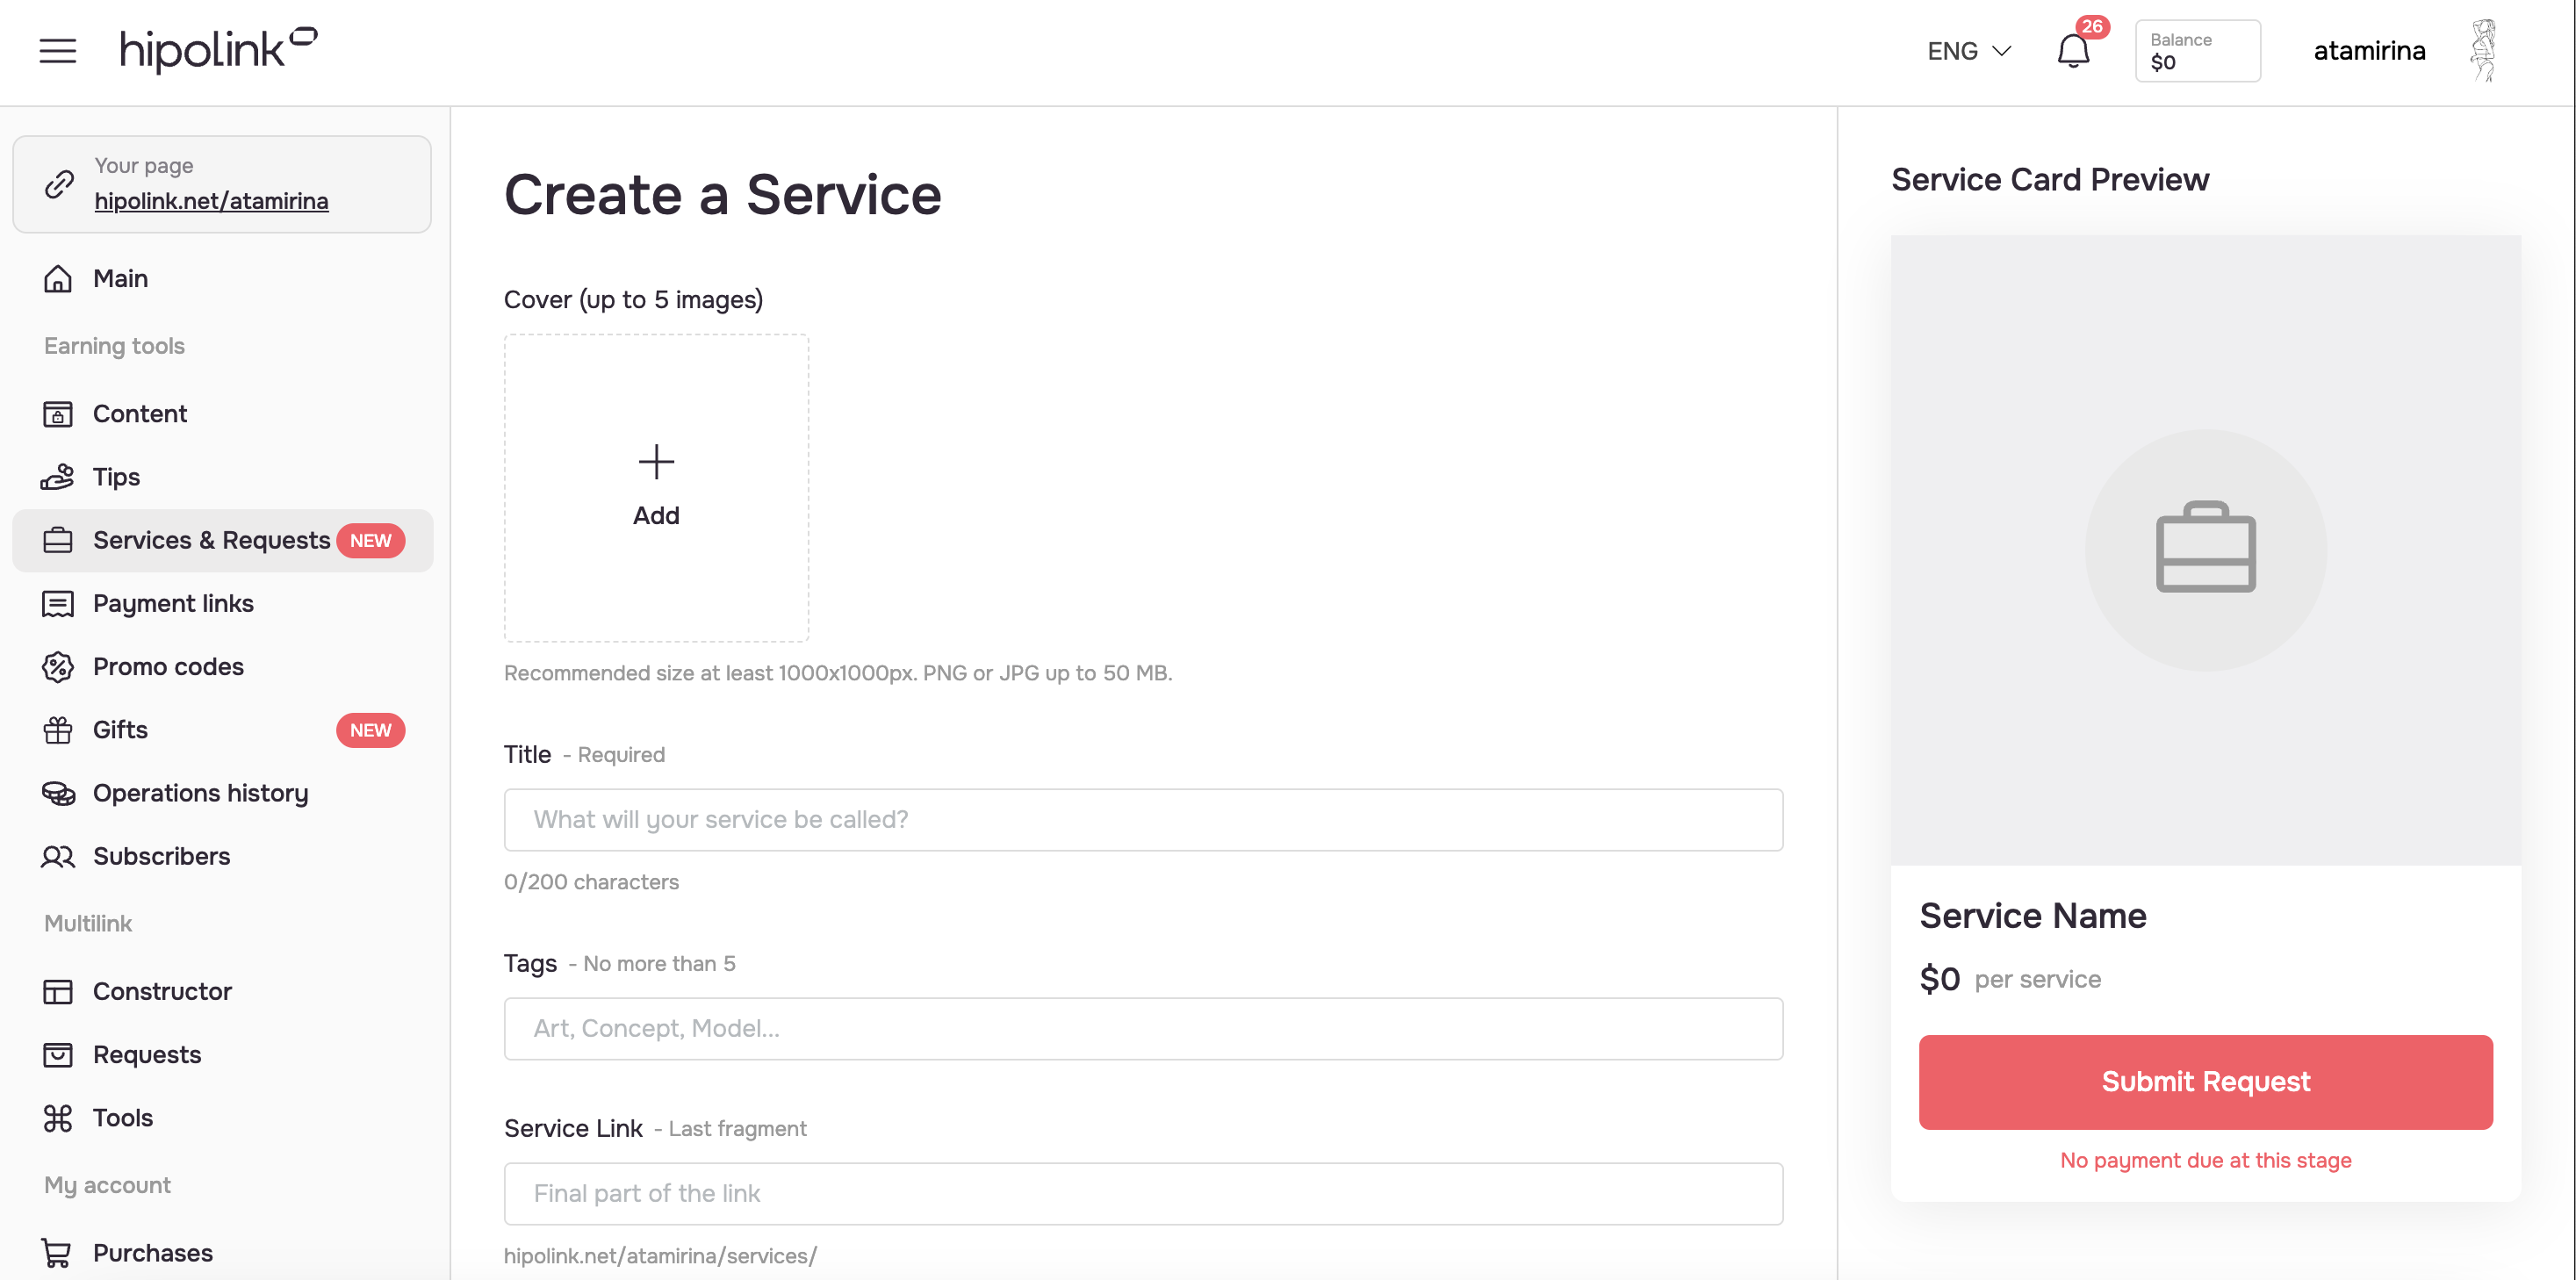
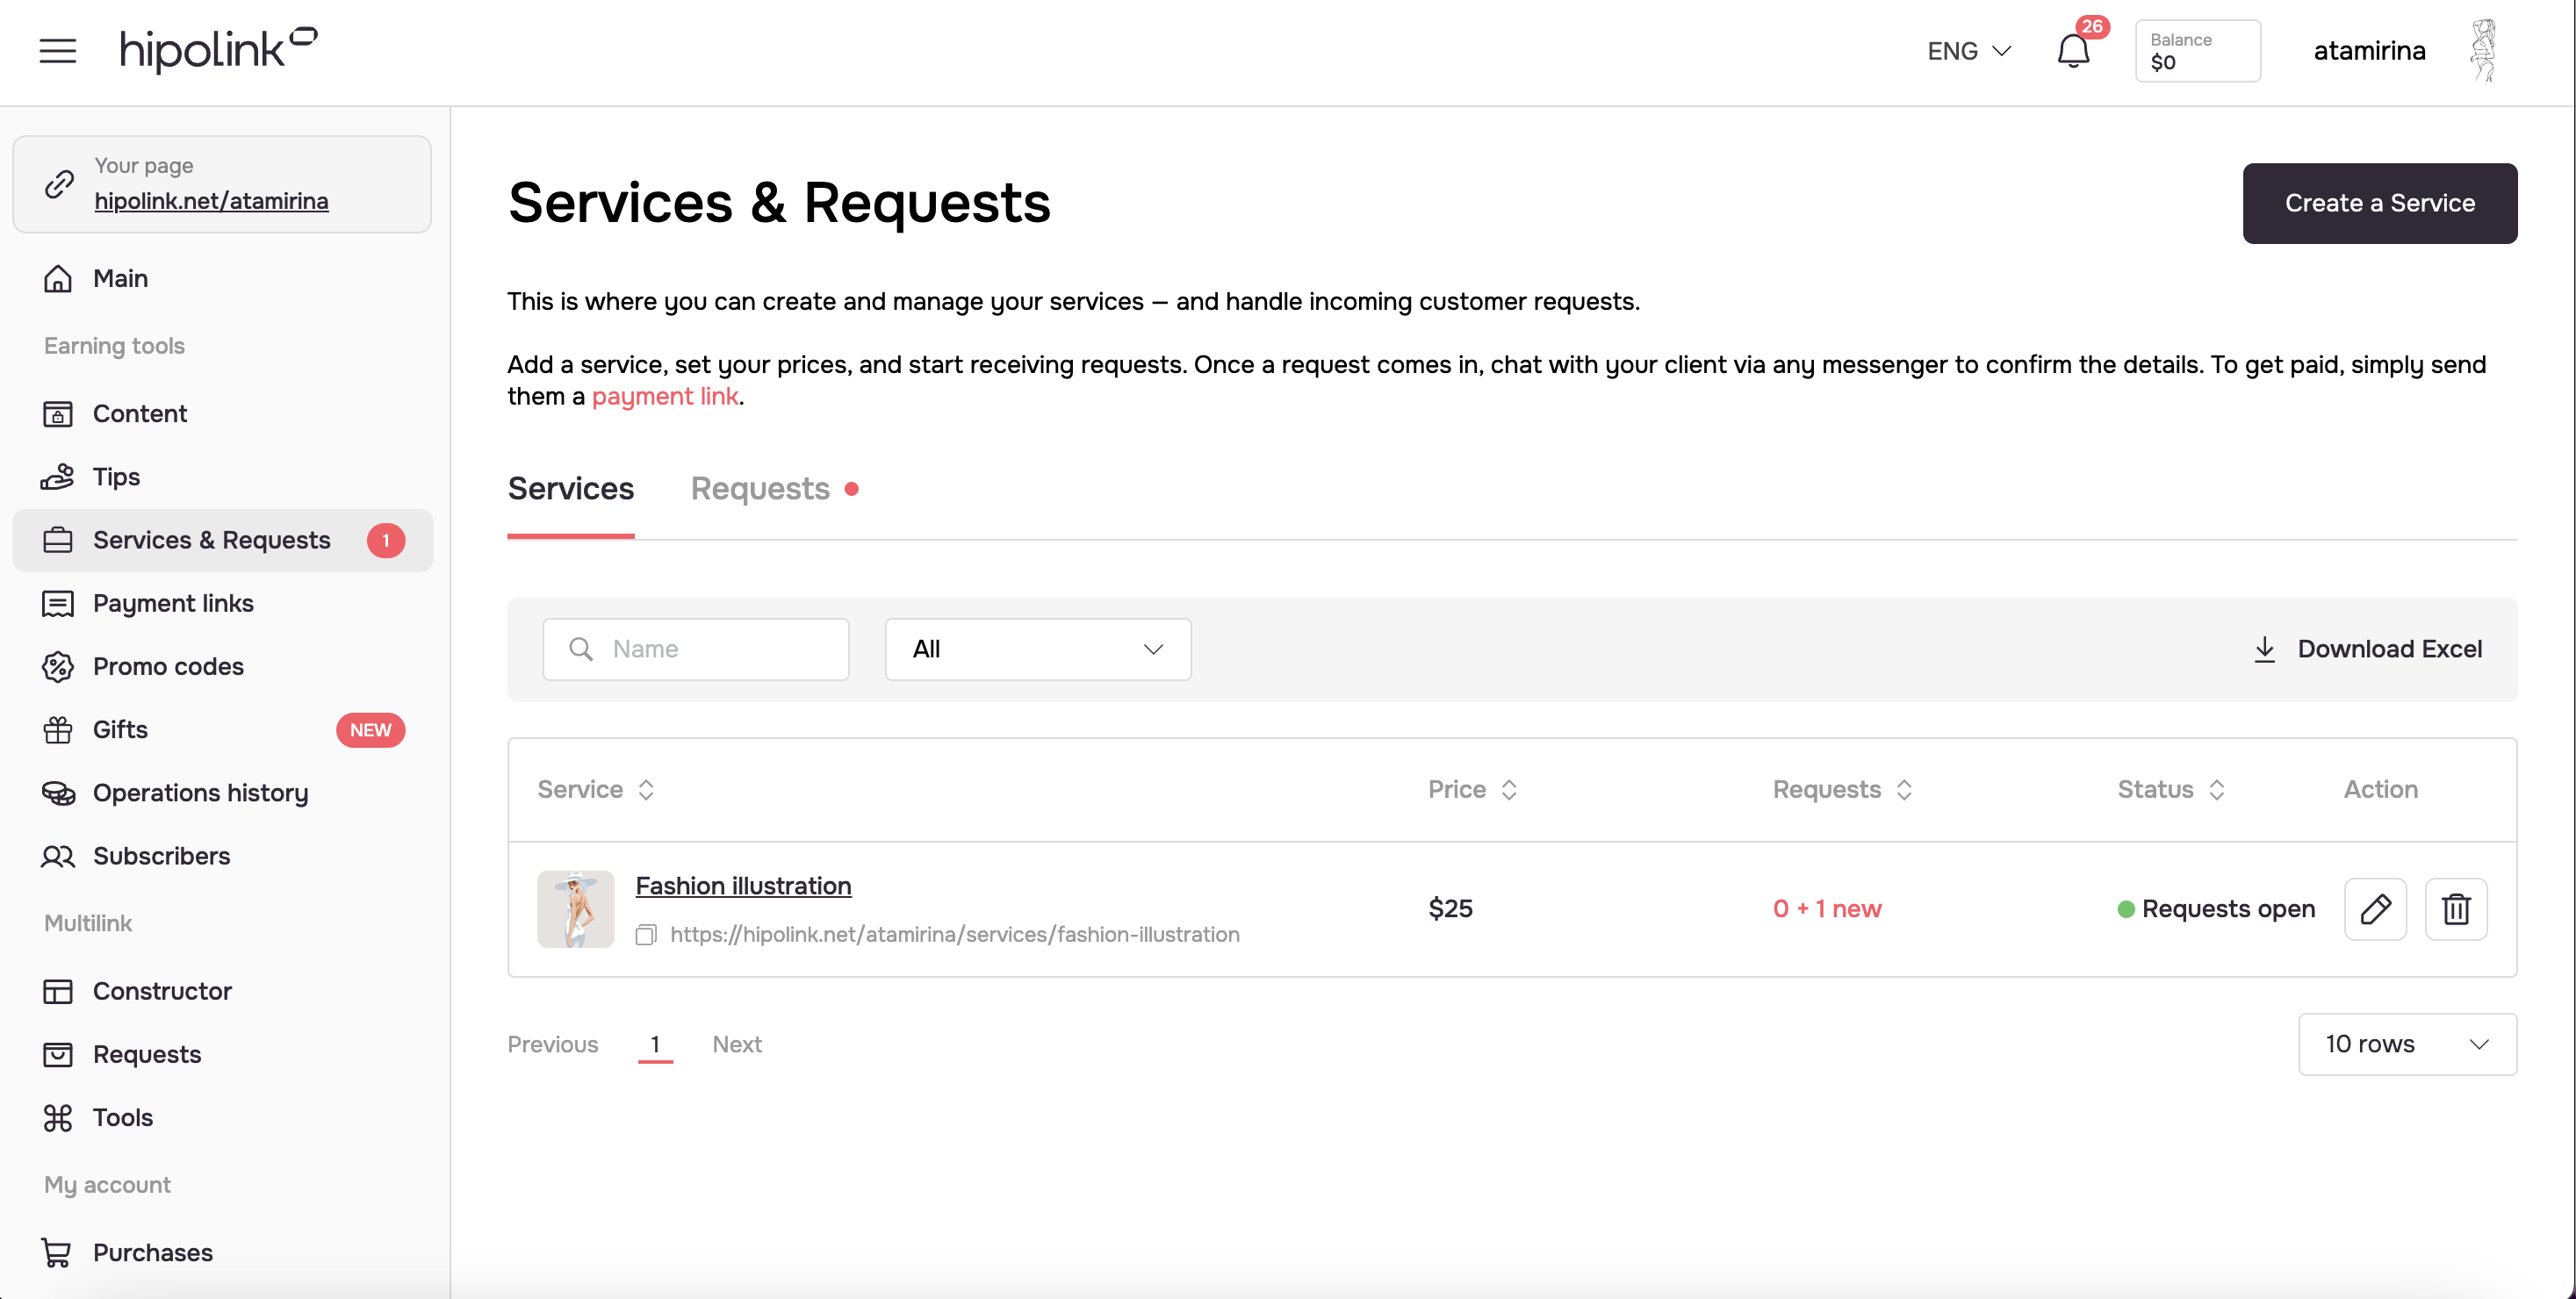
Step 1. Go to the “Services and Requests” section and click the “Create Service” button.

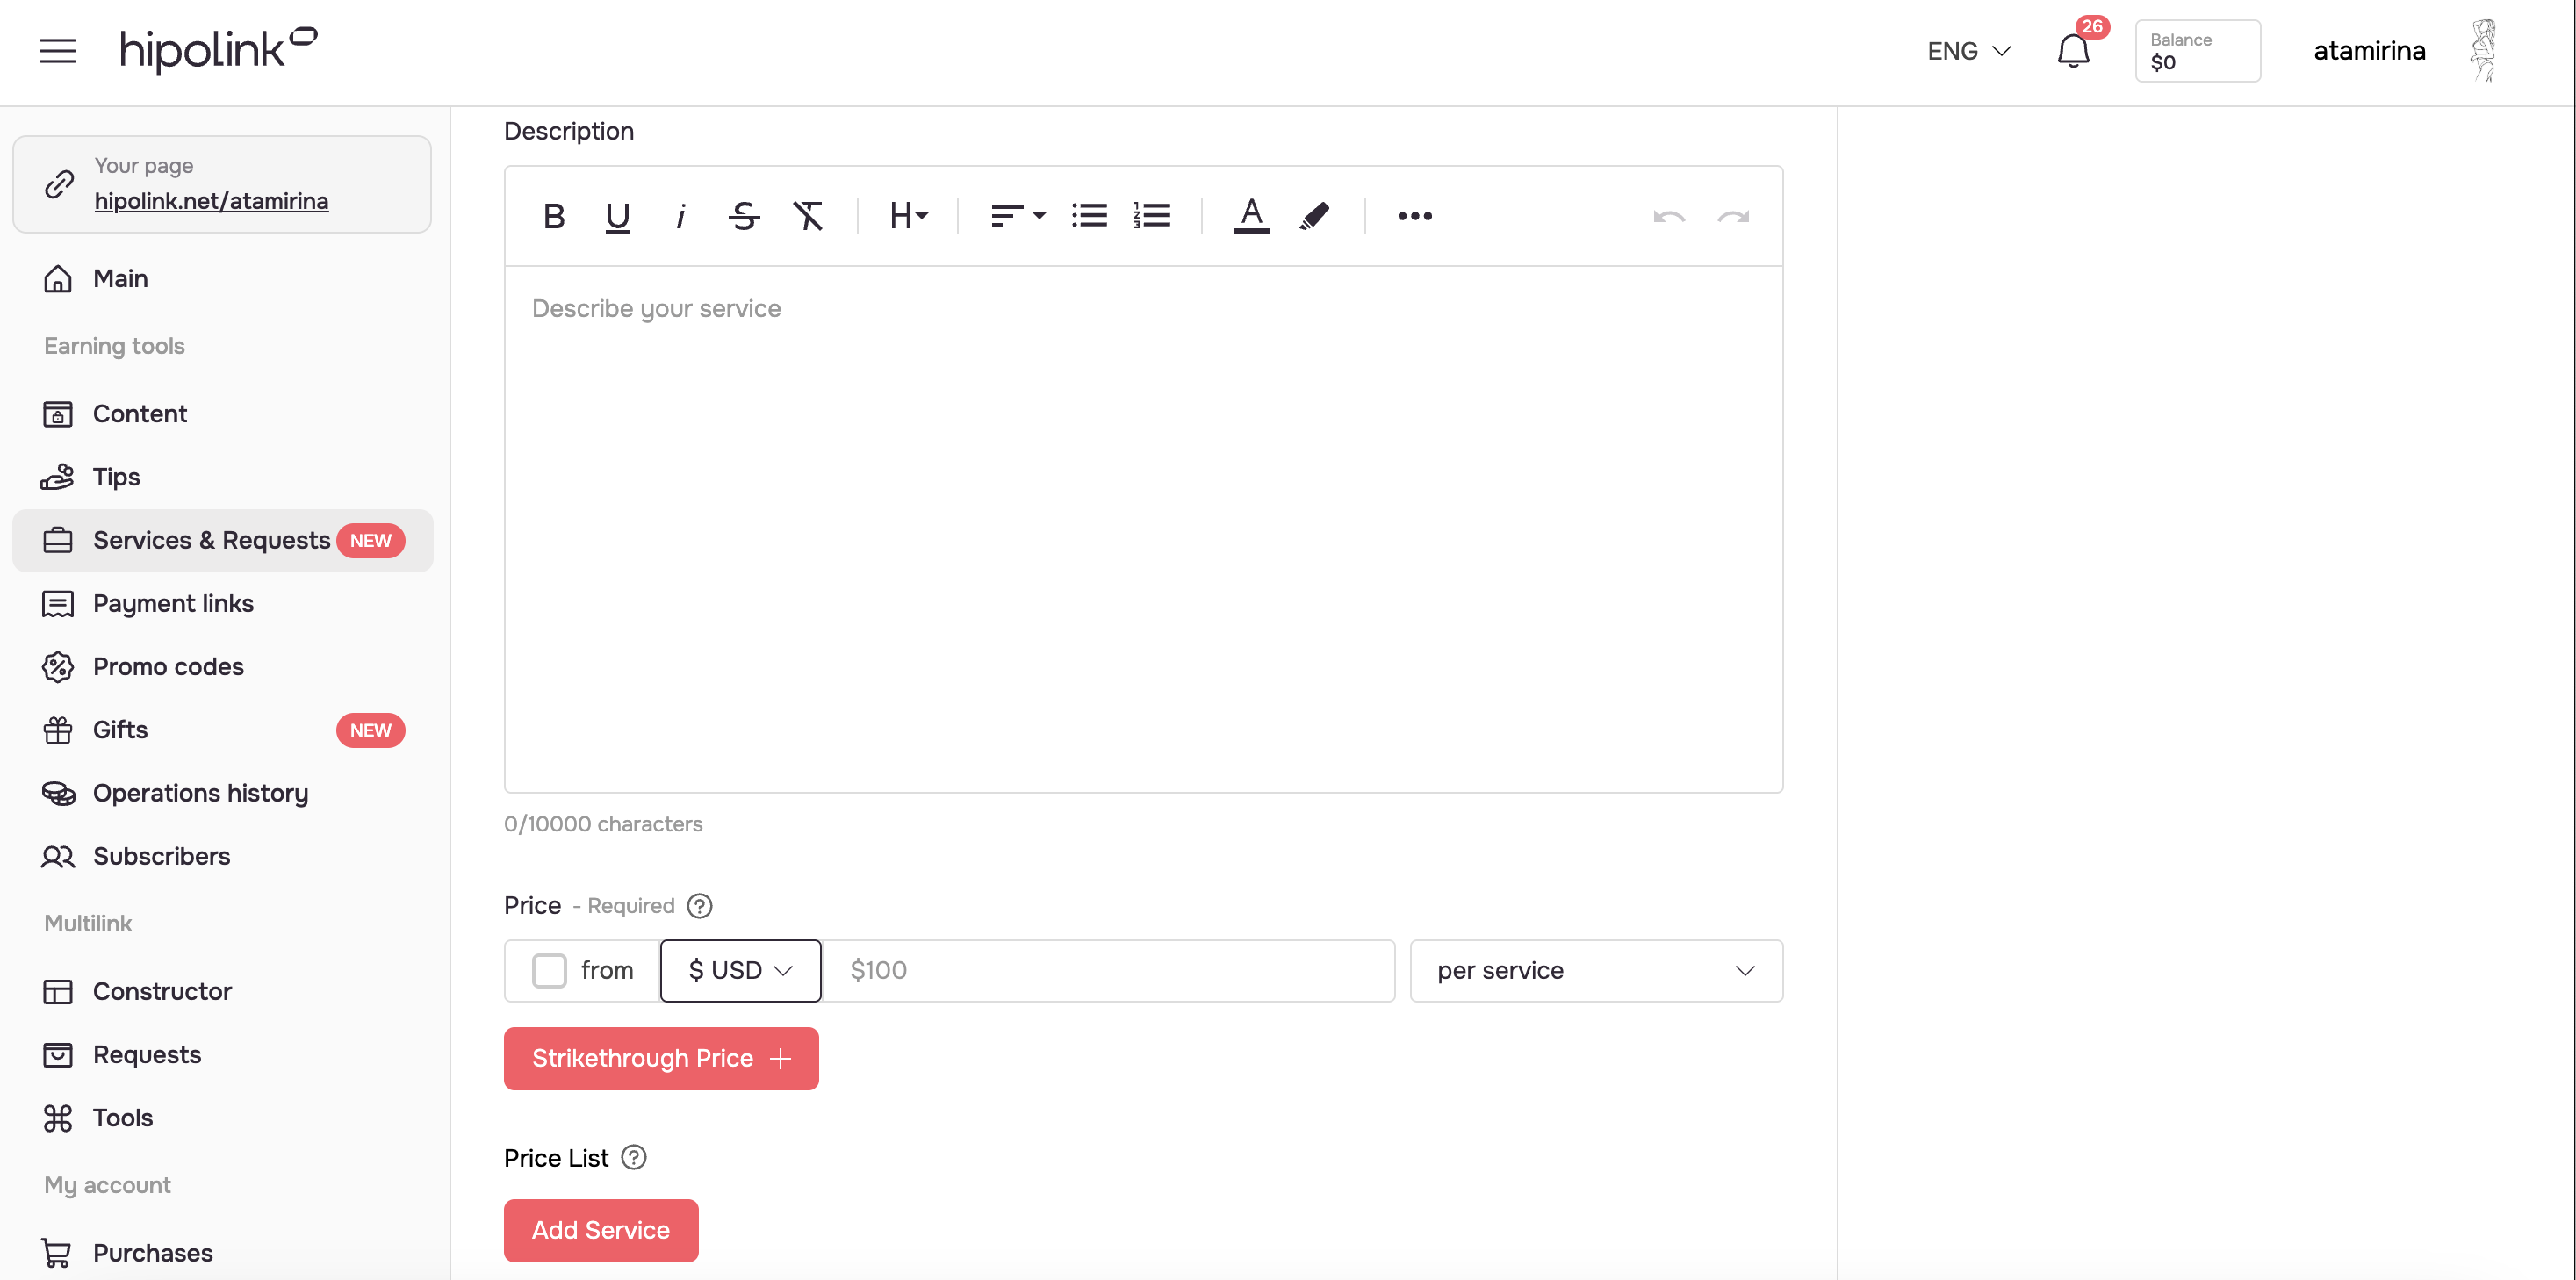
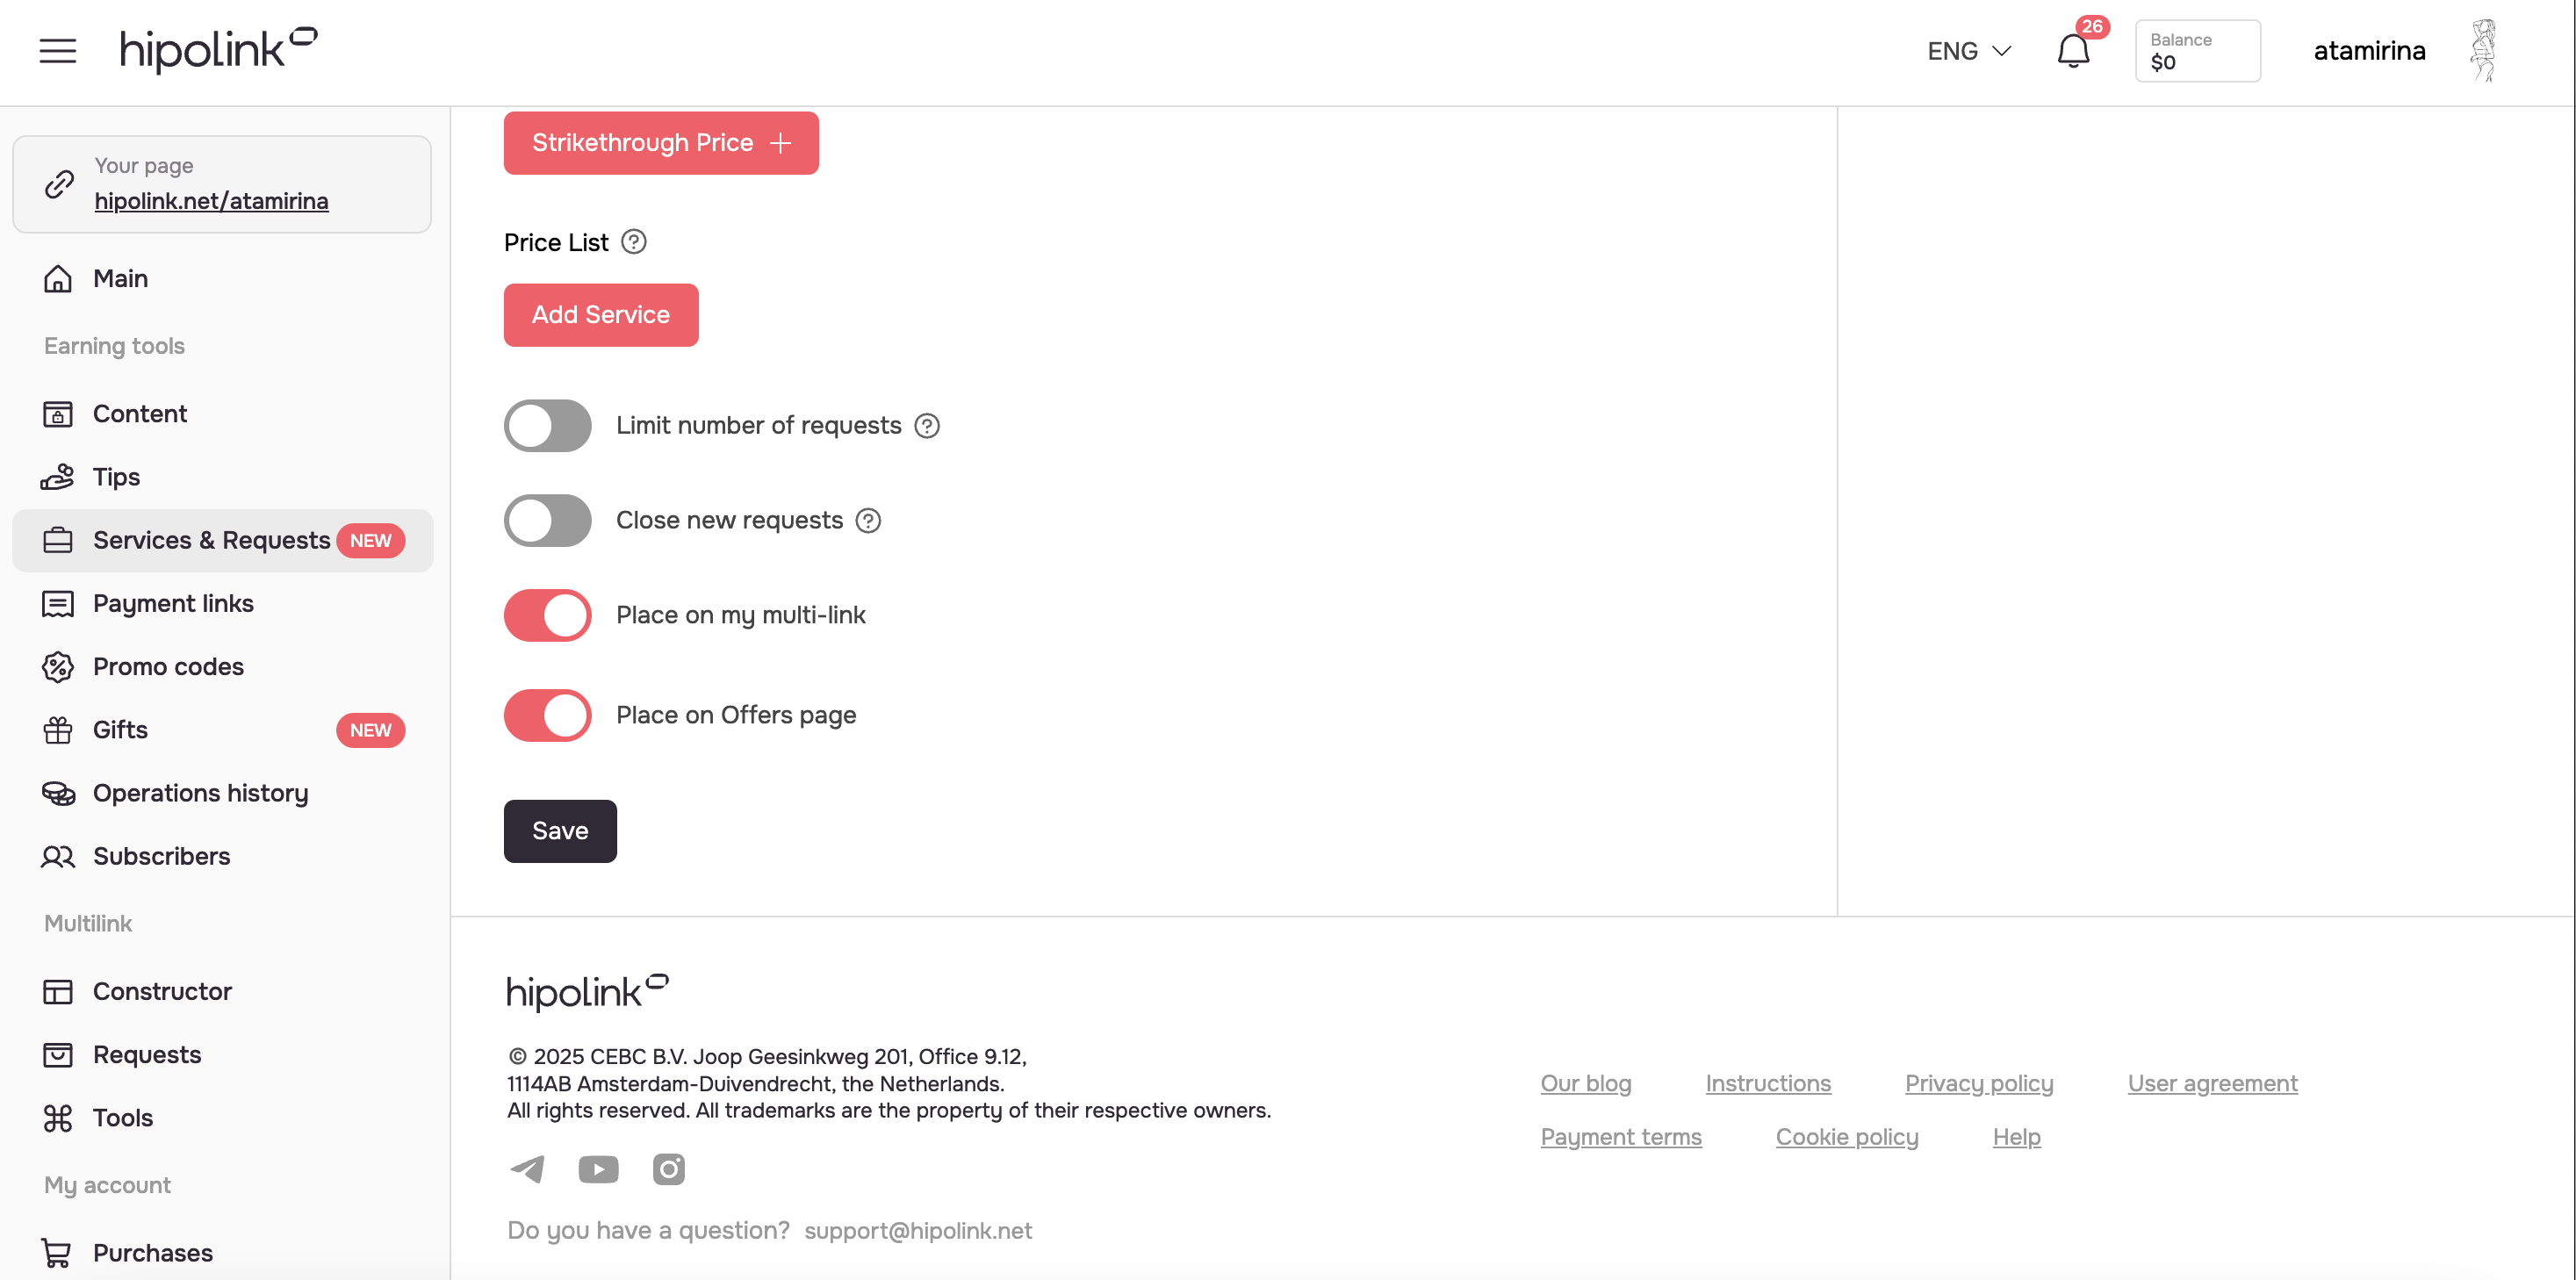
Step 2. Fill in the service card preview and save your changes.
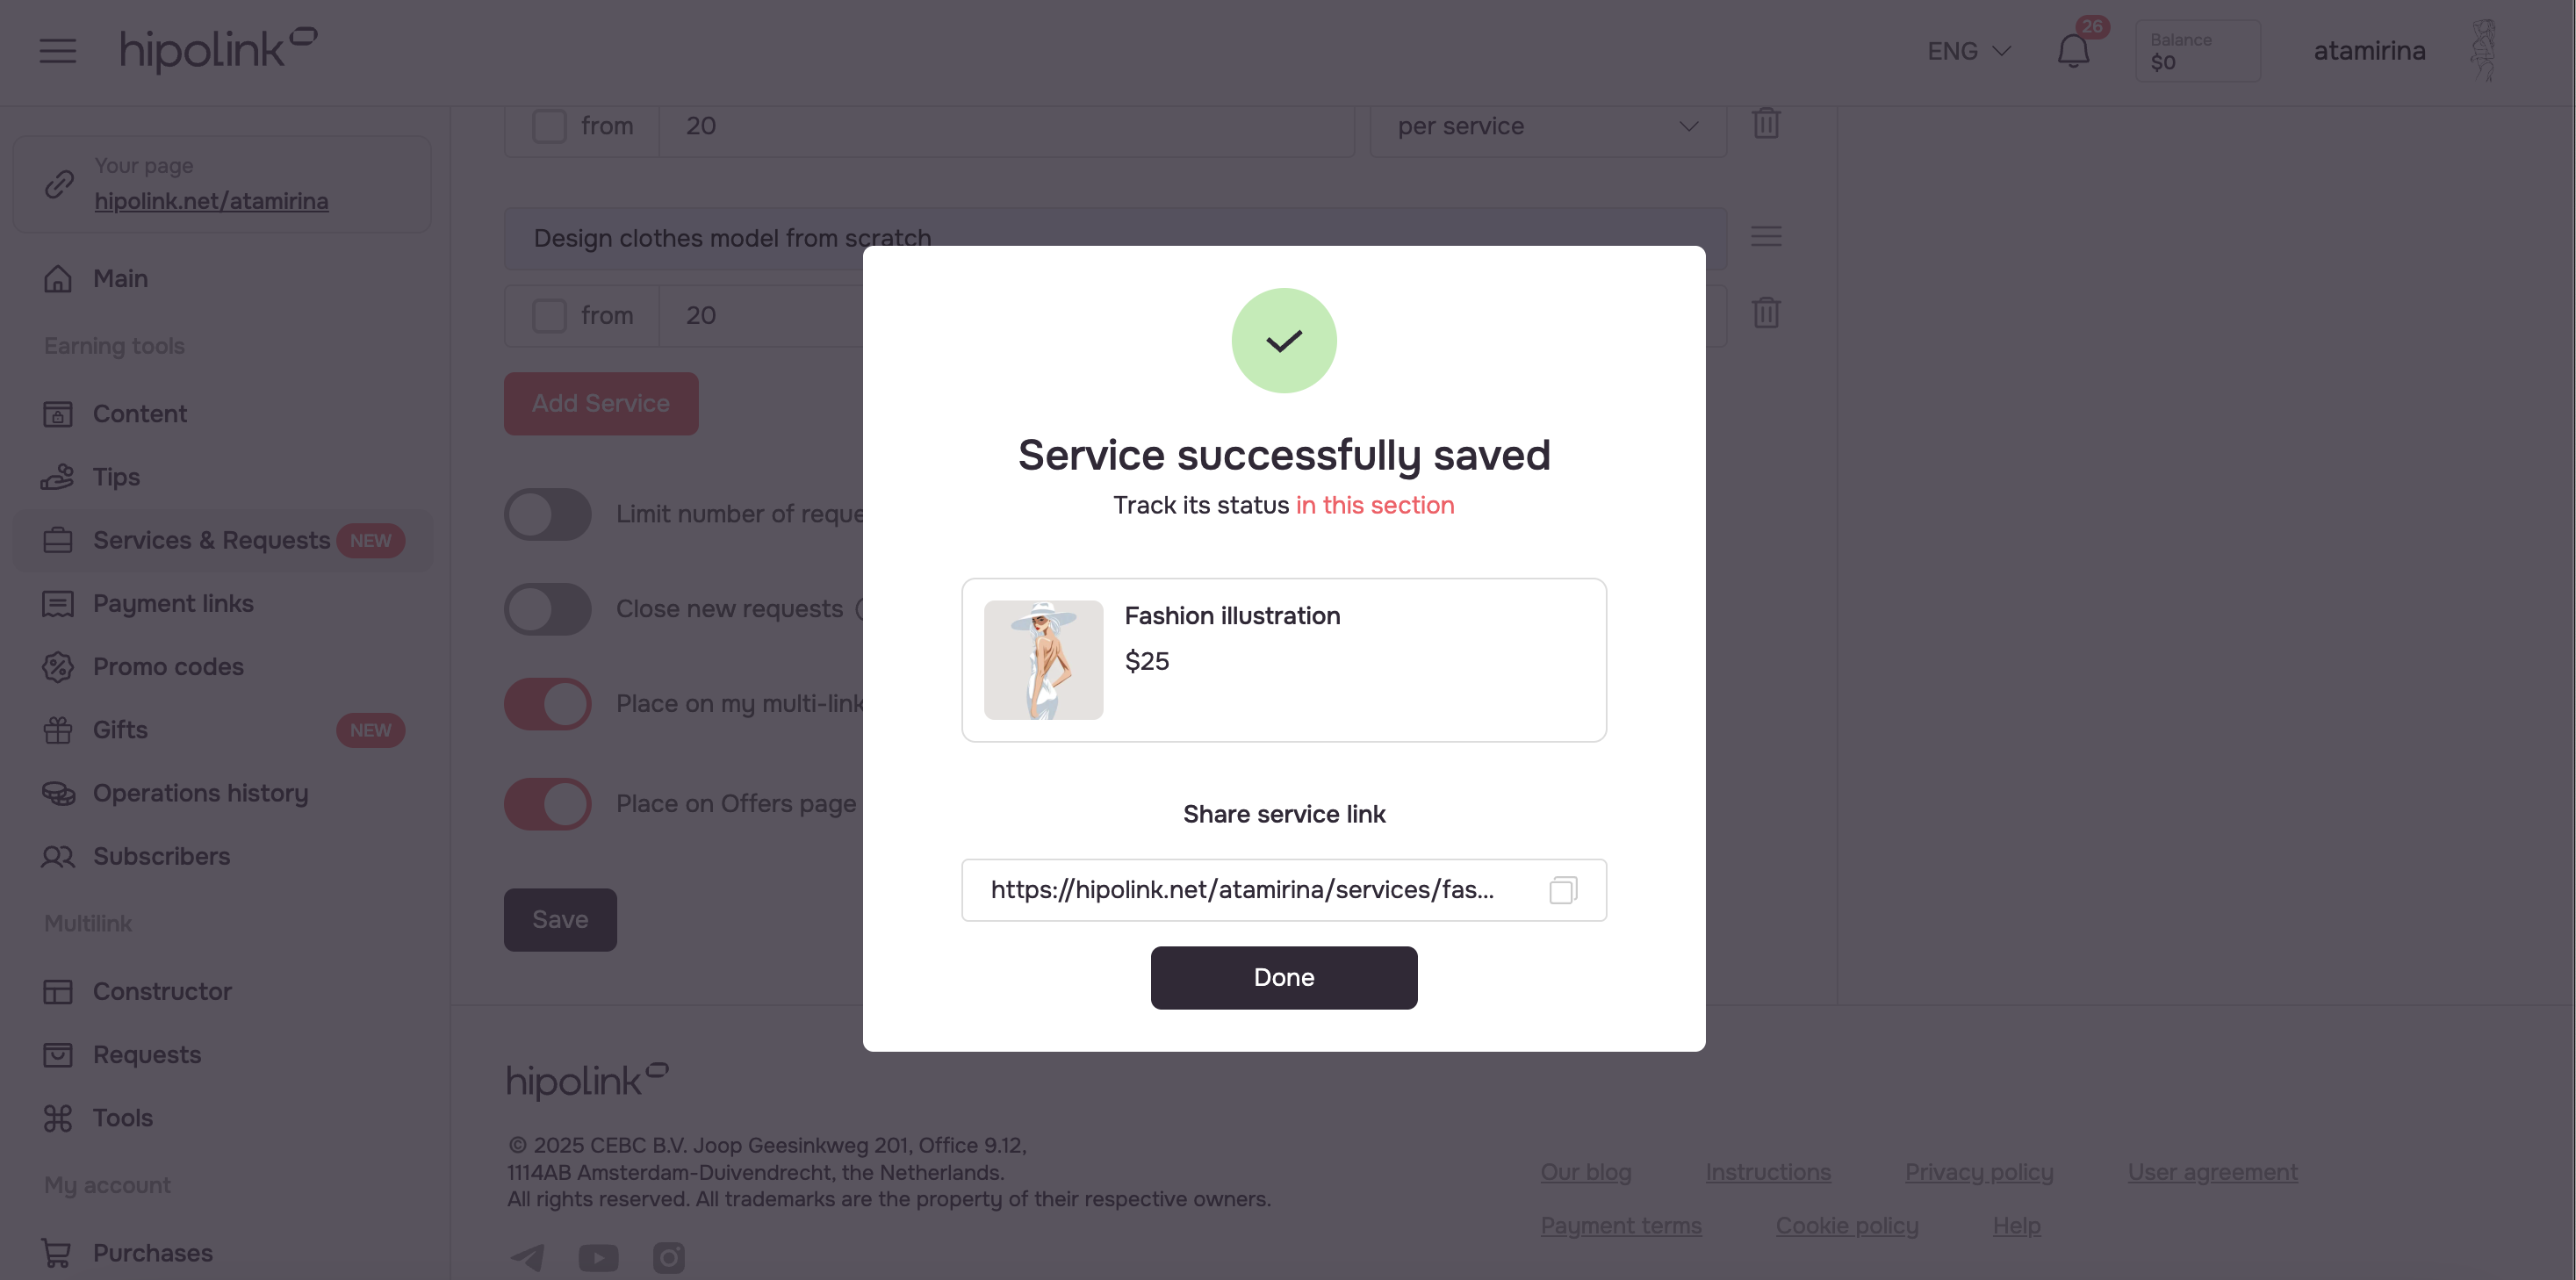
Step 3. The service is now successfully created and will appear in your list of services.
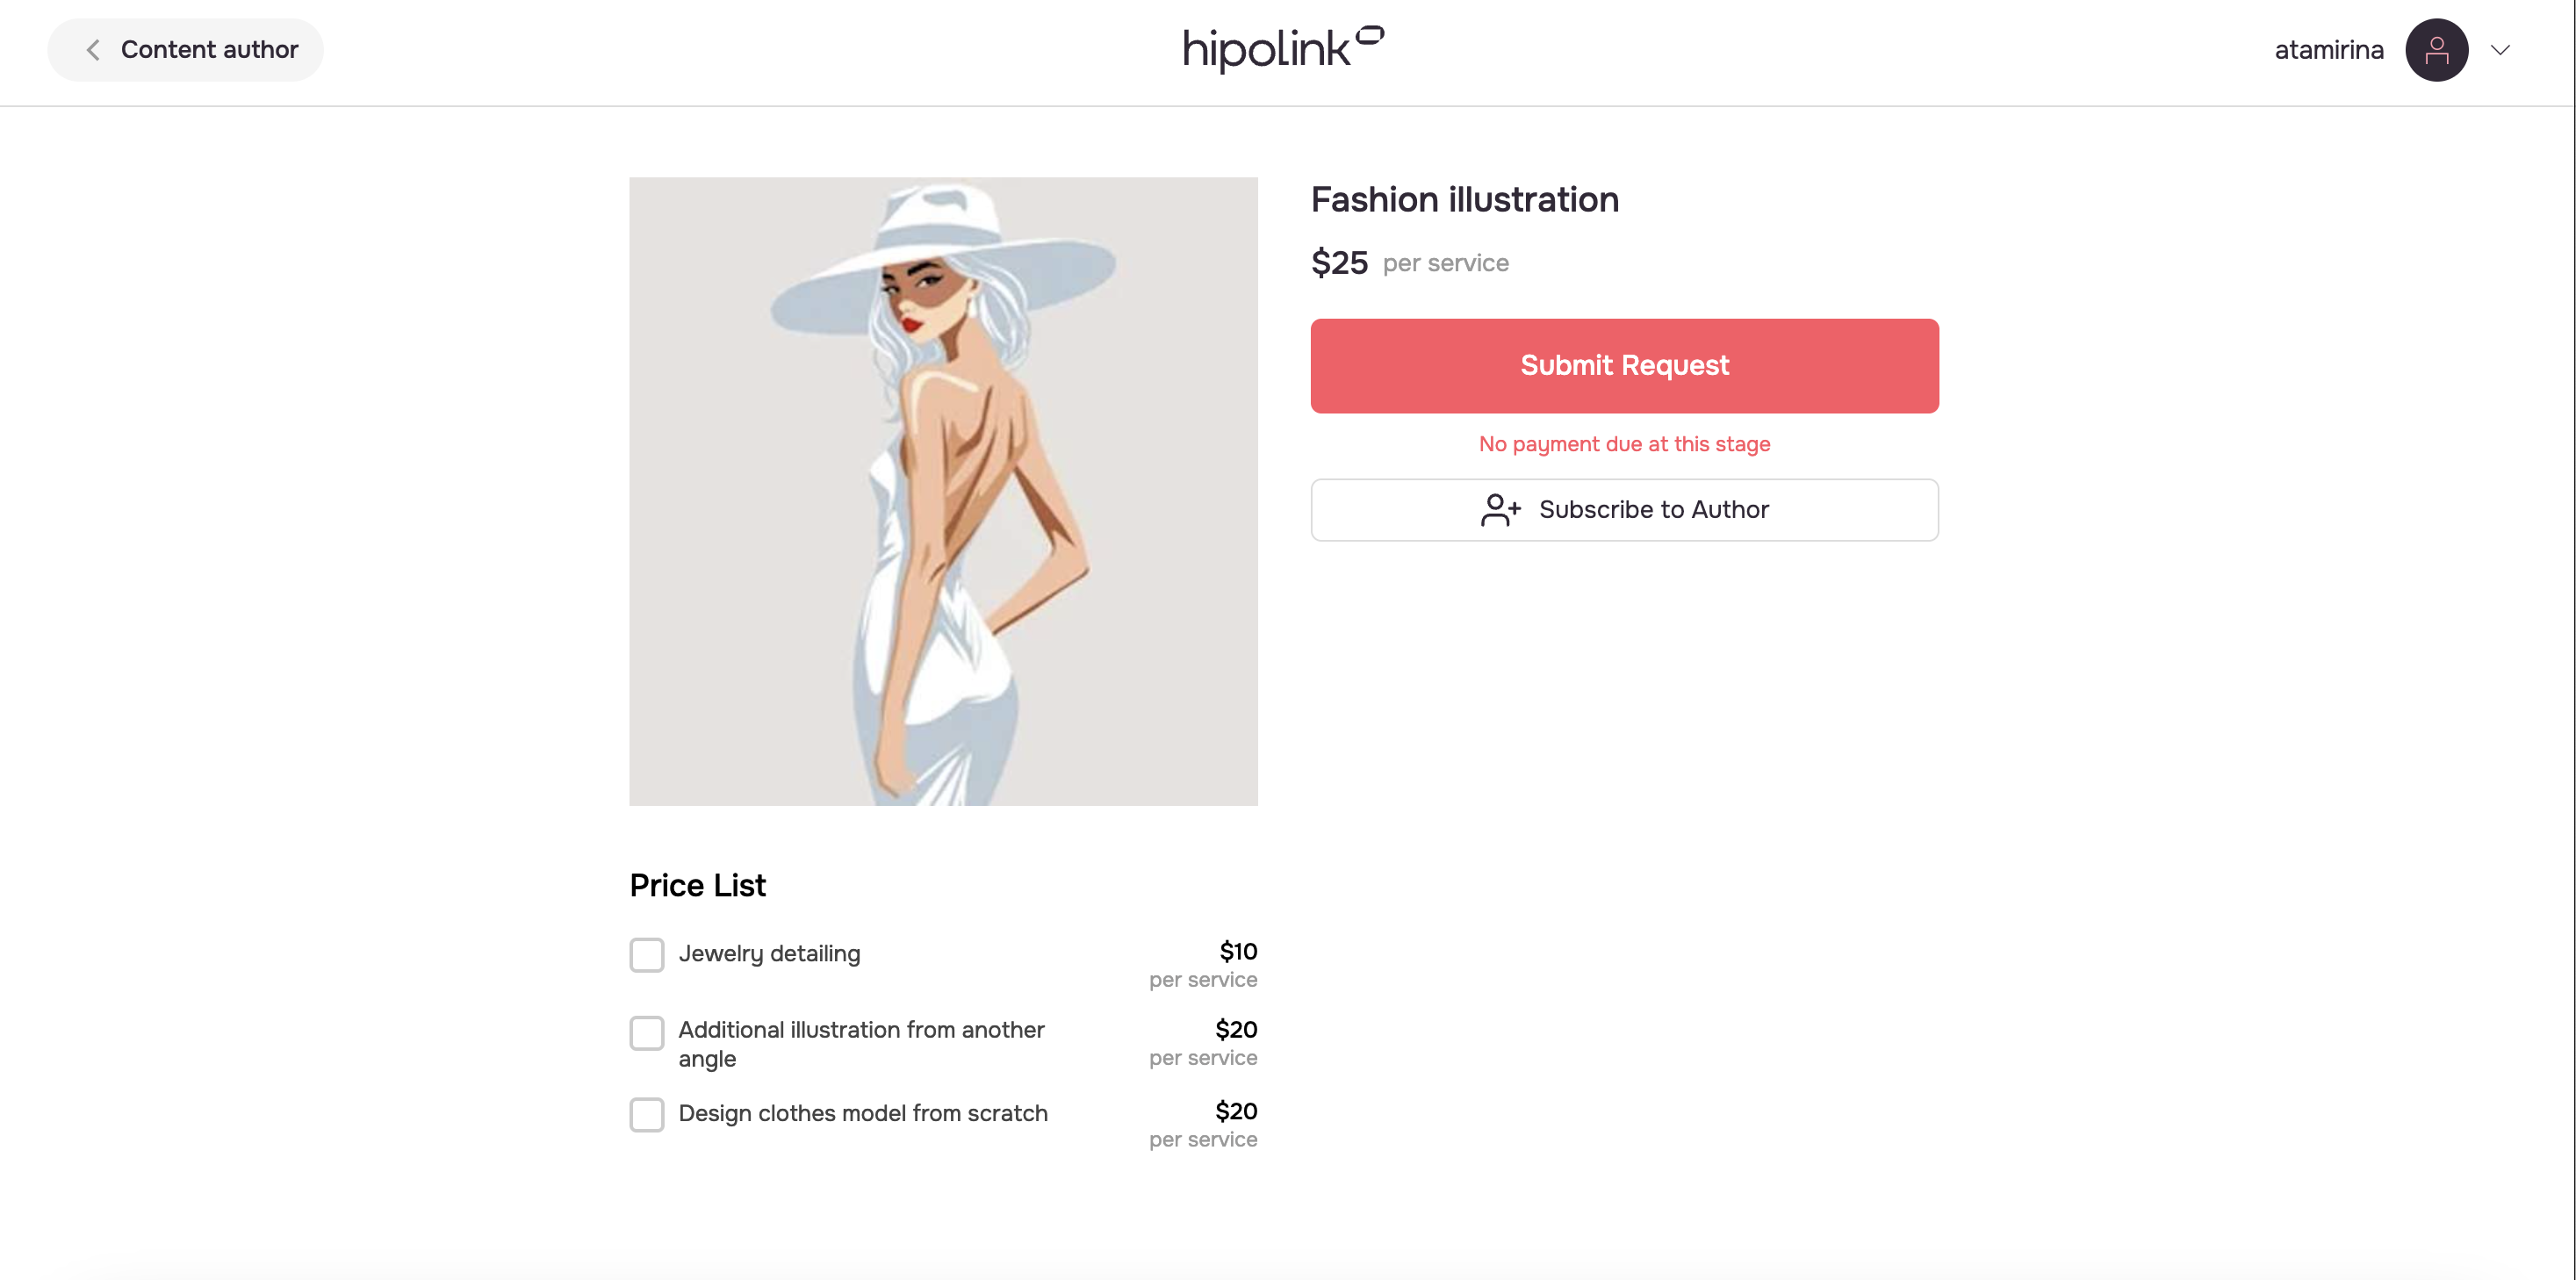
How the Client Sees and Orders the Service
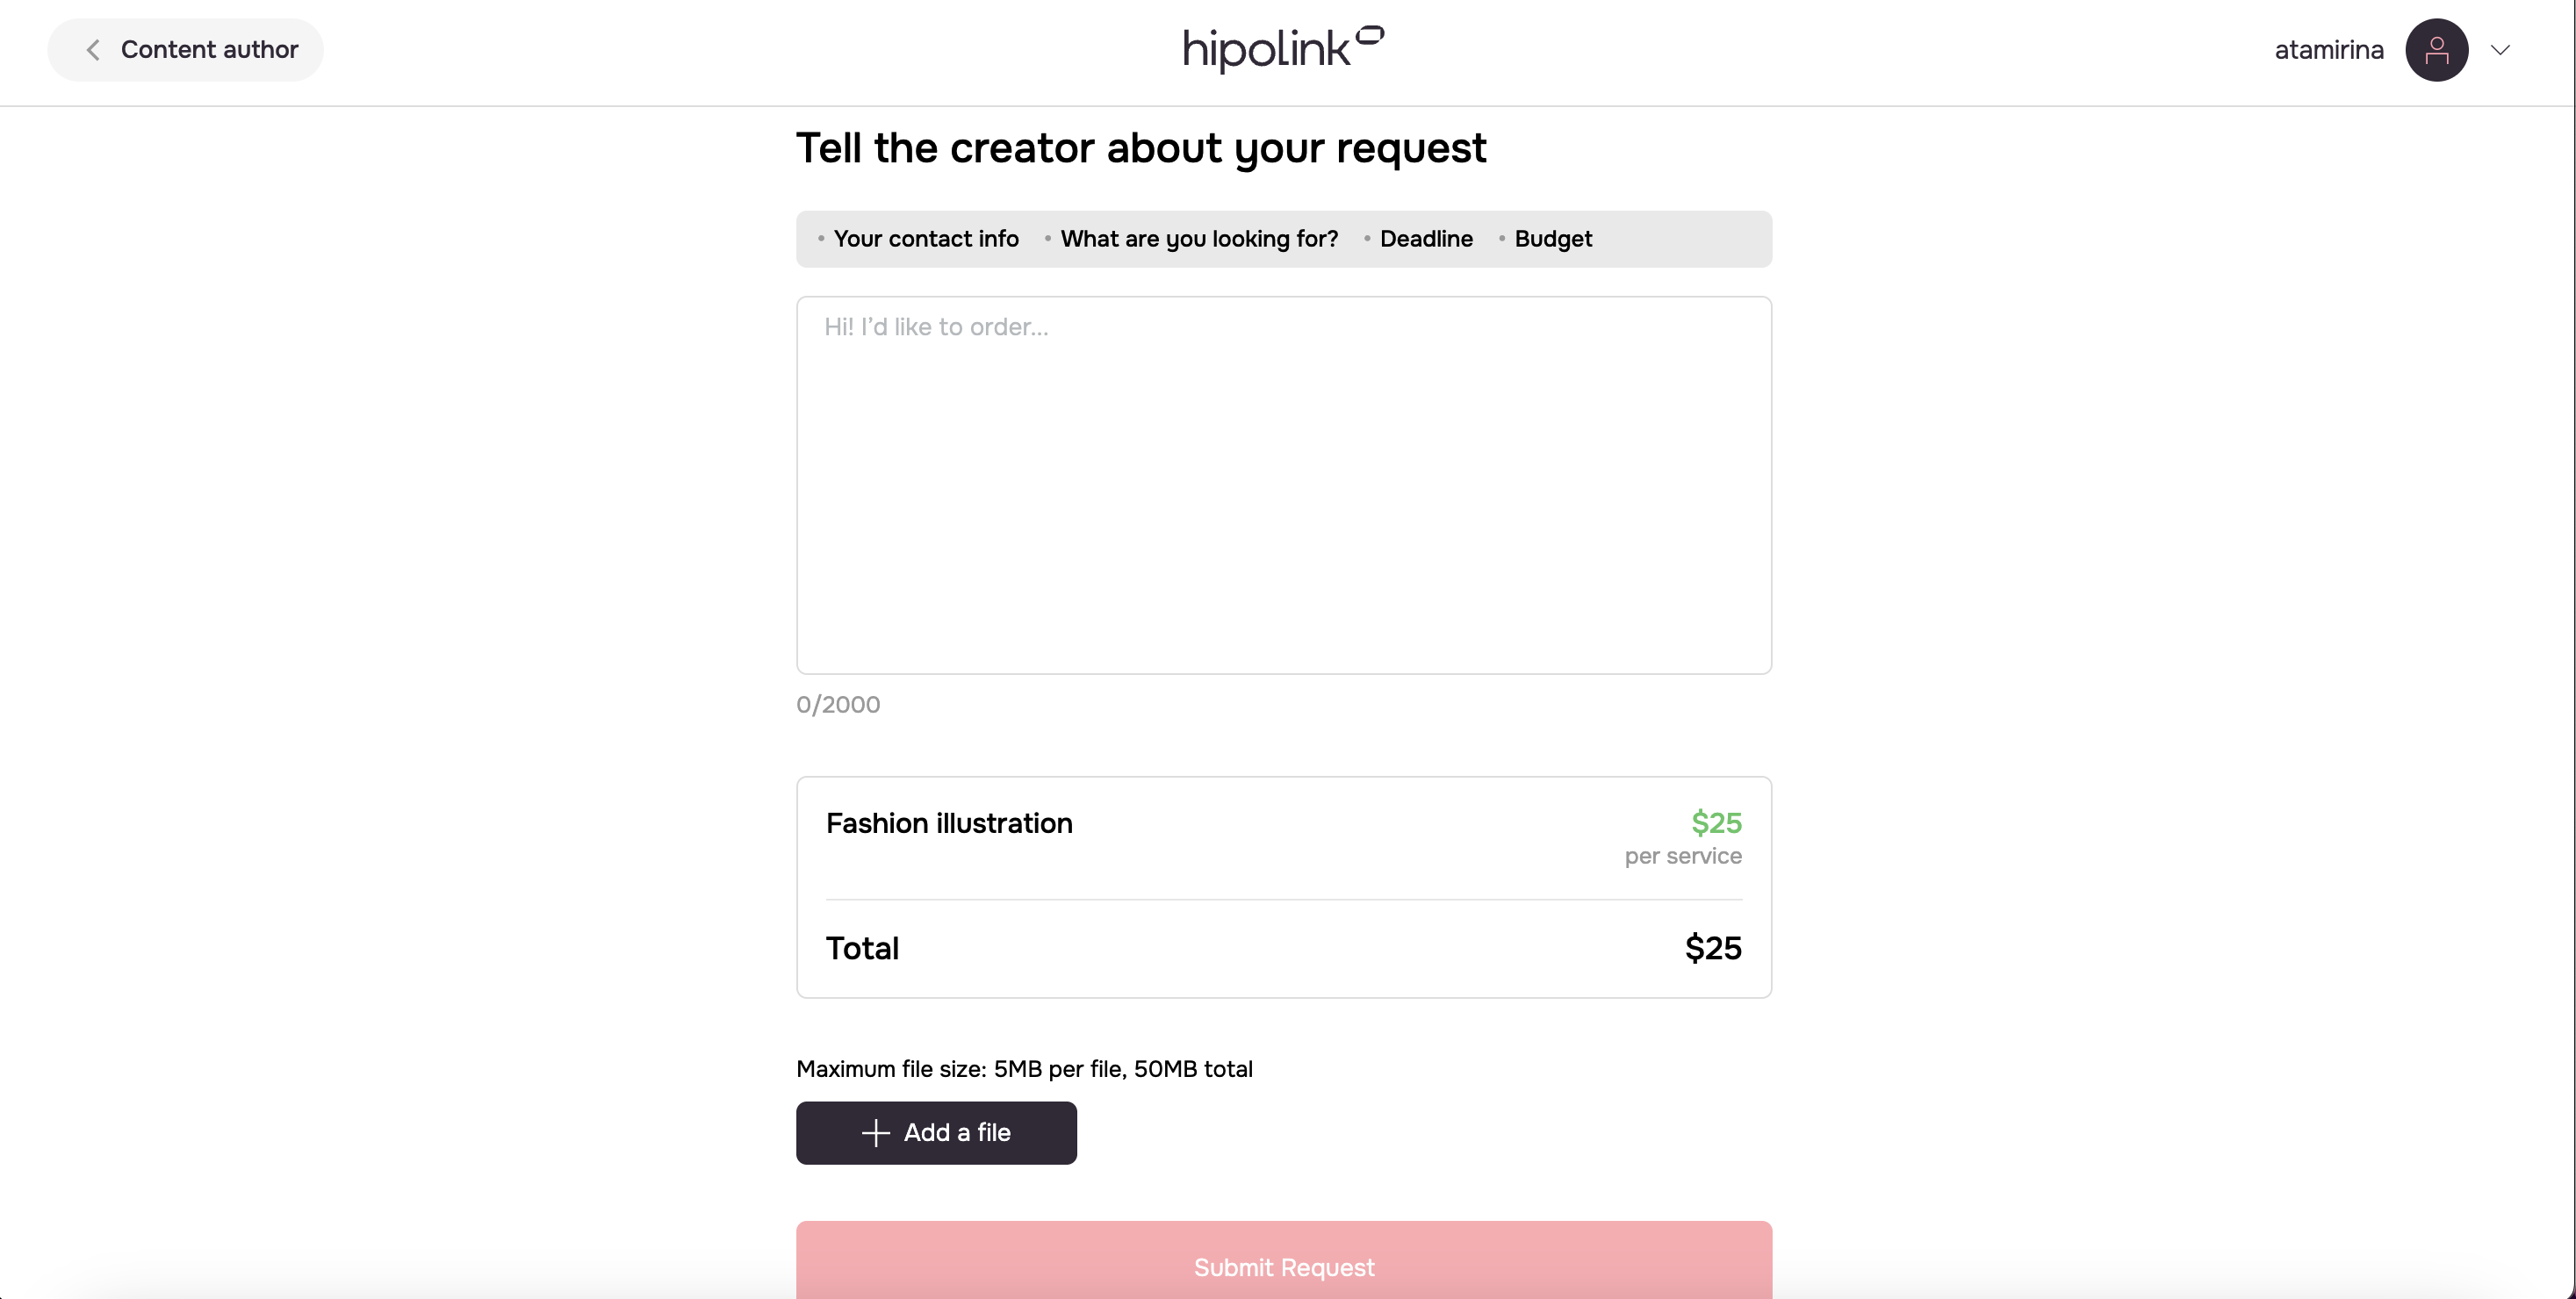
Clients can access the service via your multi-link or a direct link. There, they’ll be able to submit a request by:
- providing all the necessary information,
- attaching files (if needed).
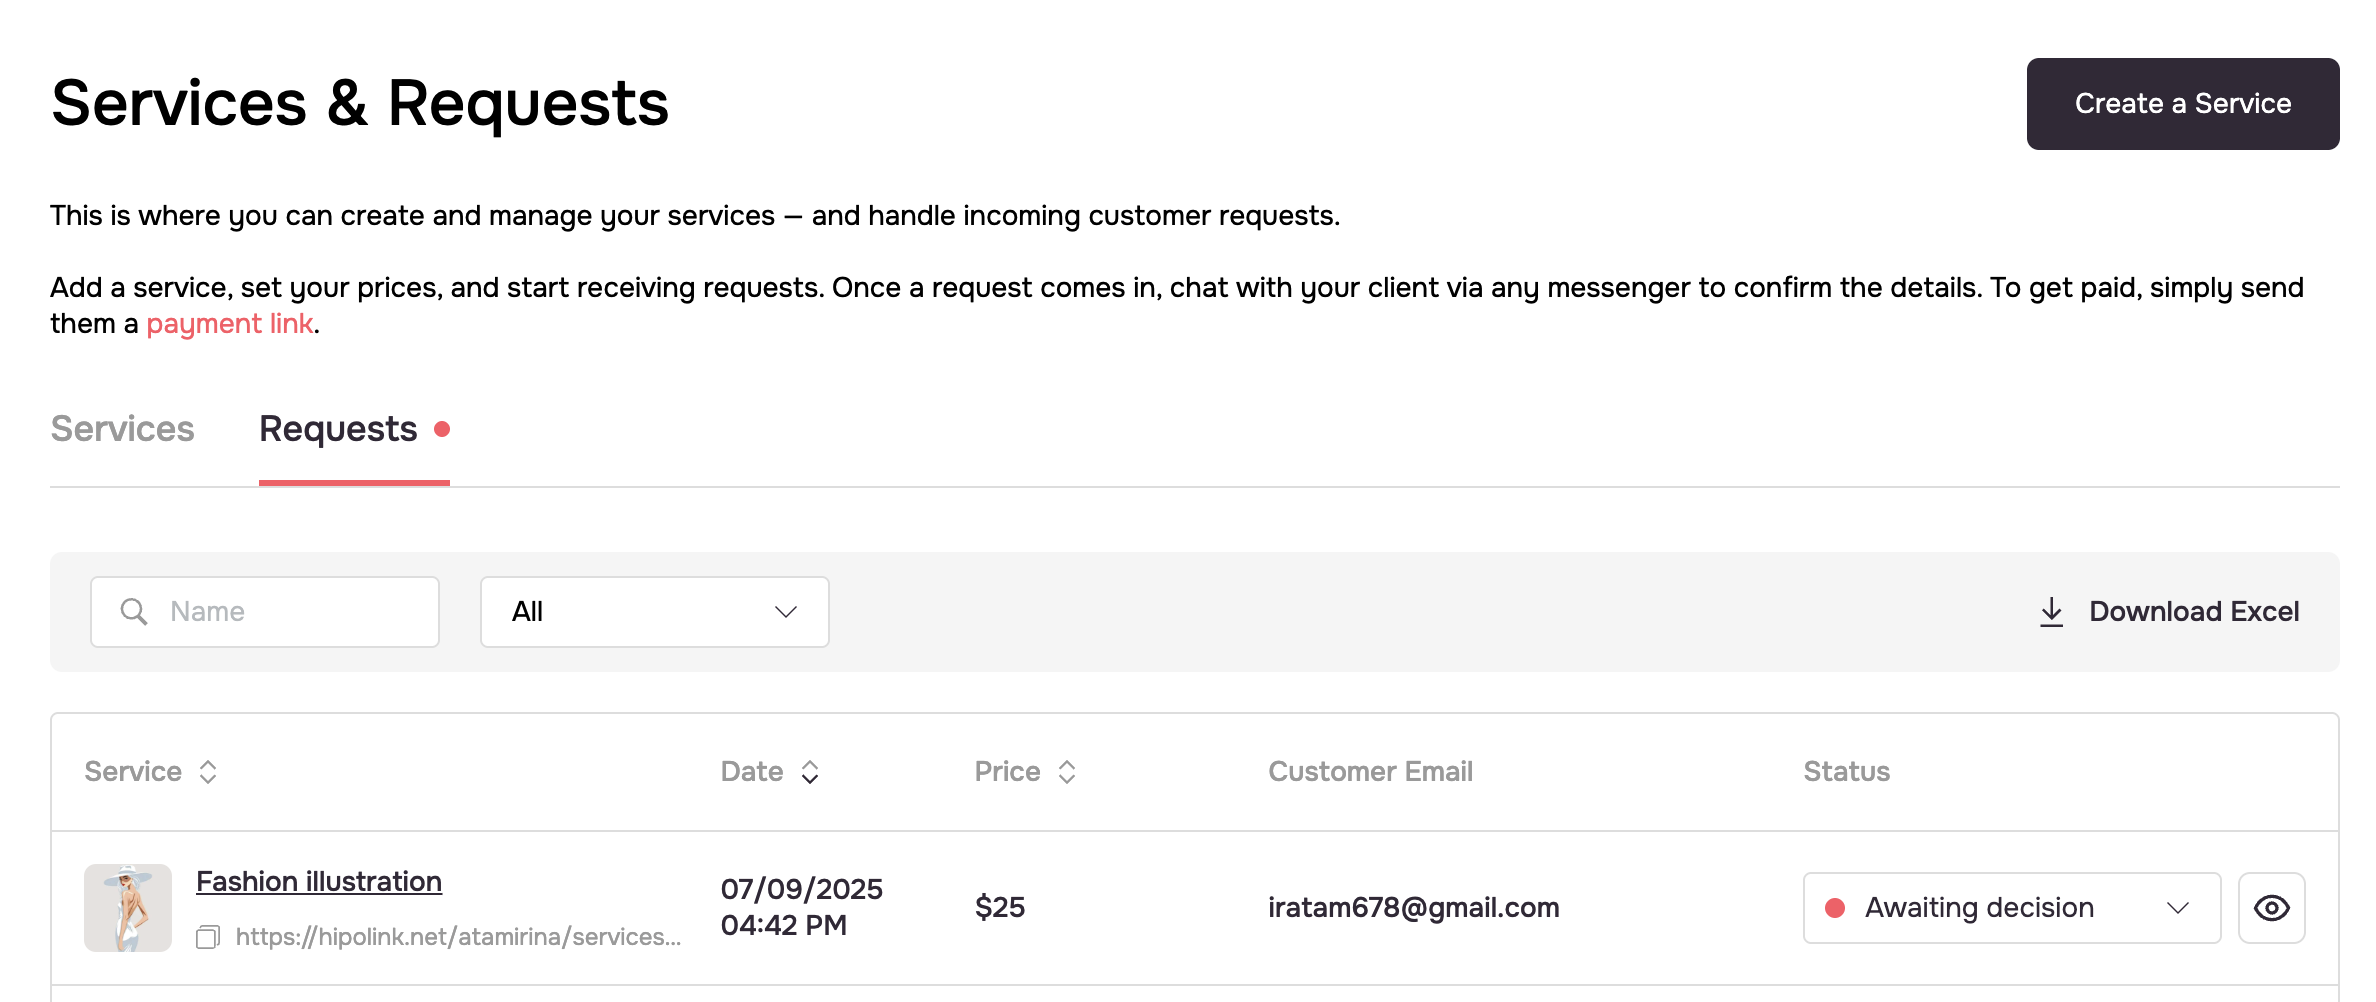
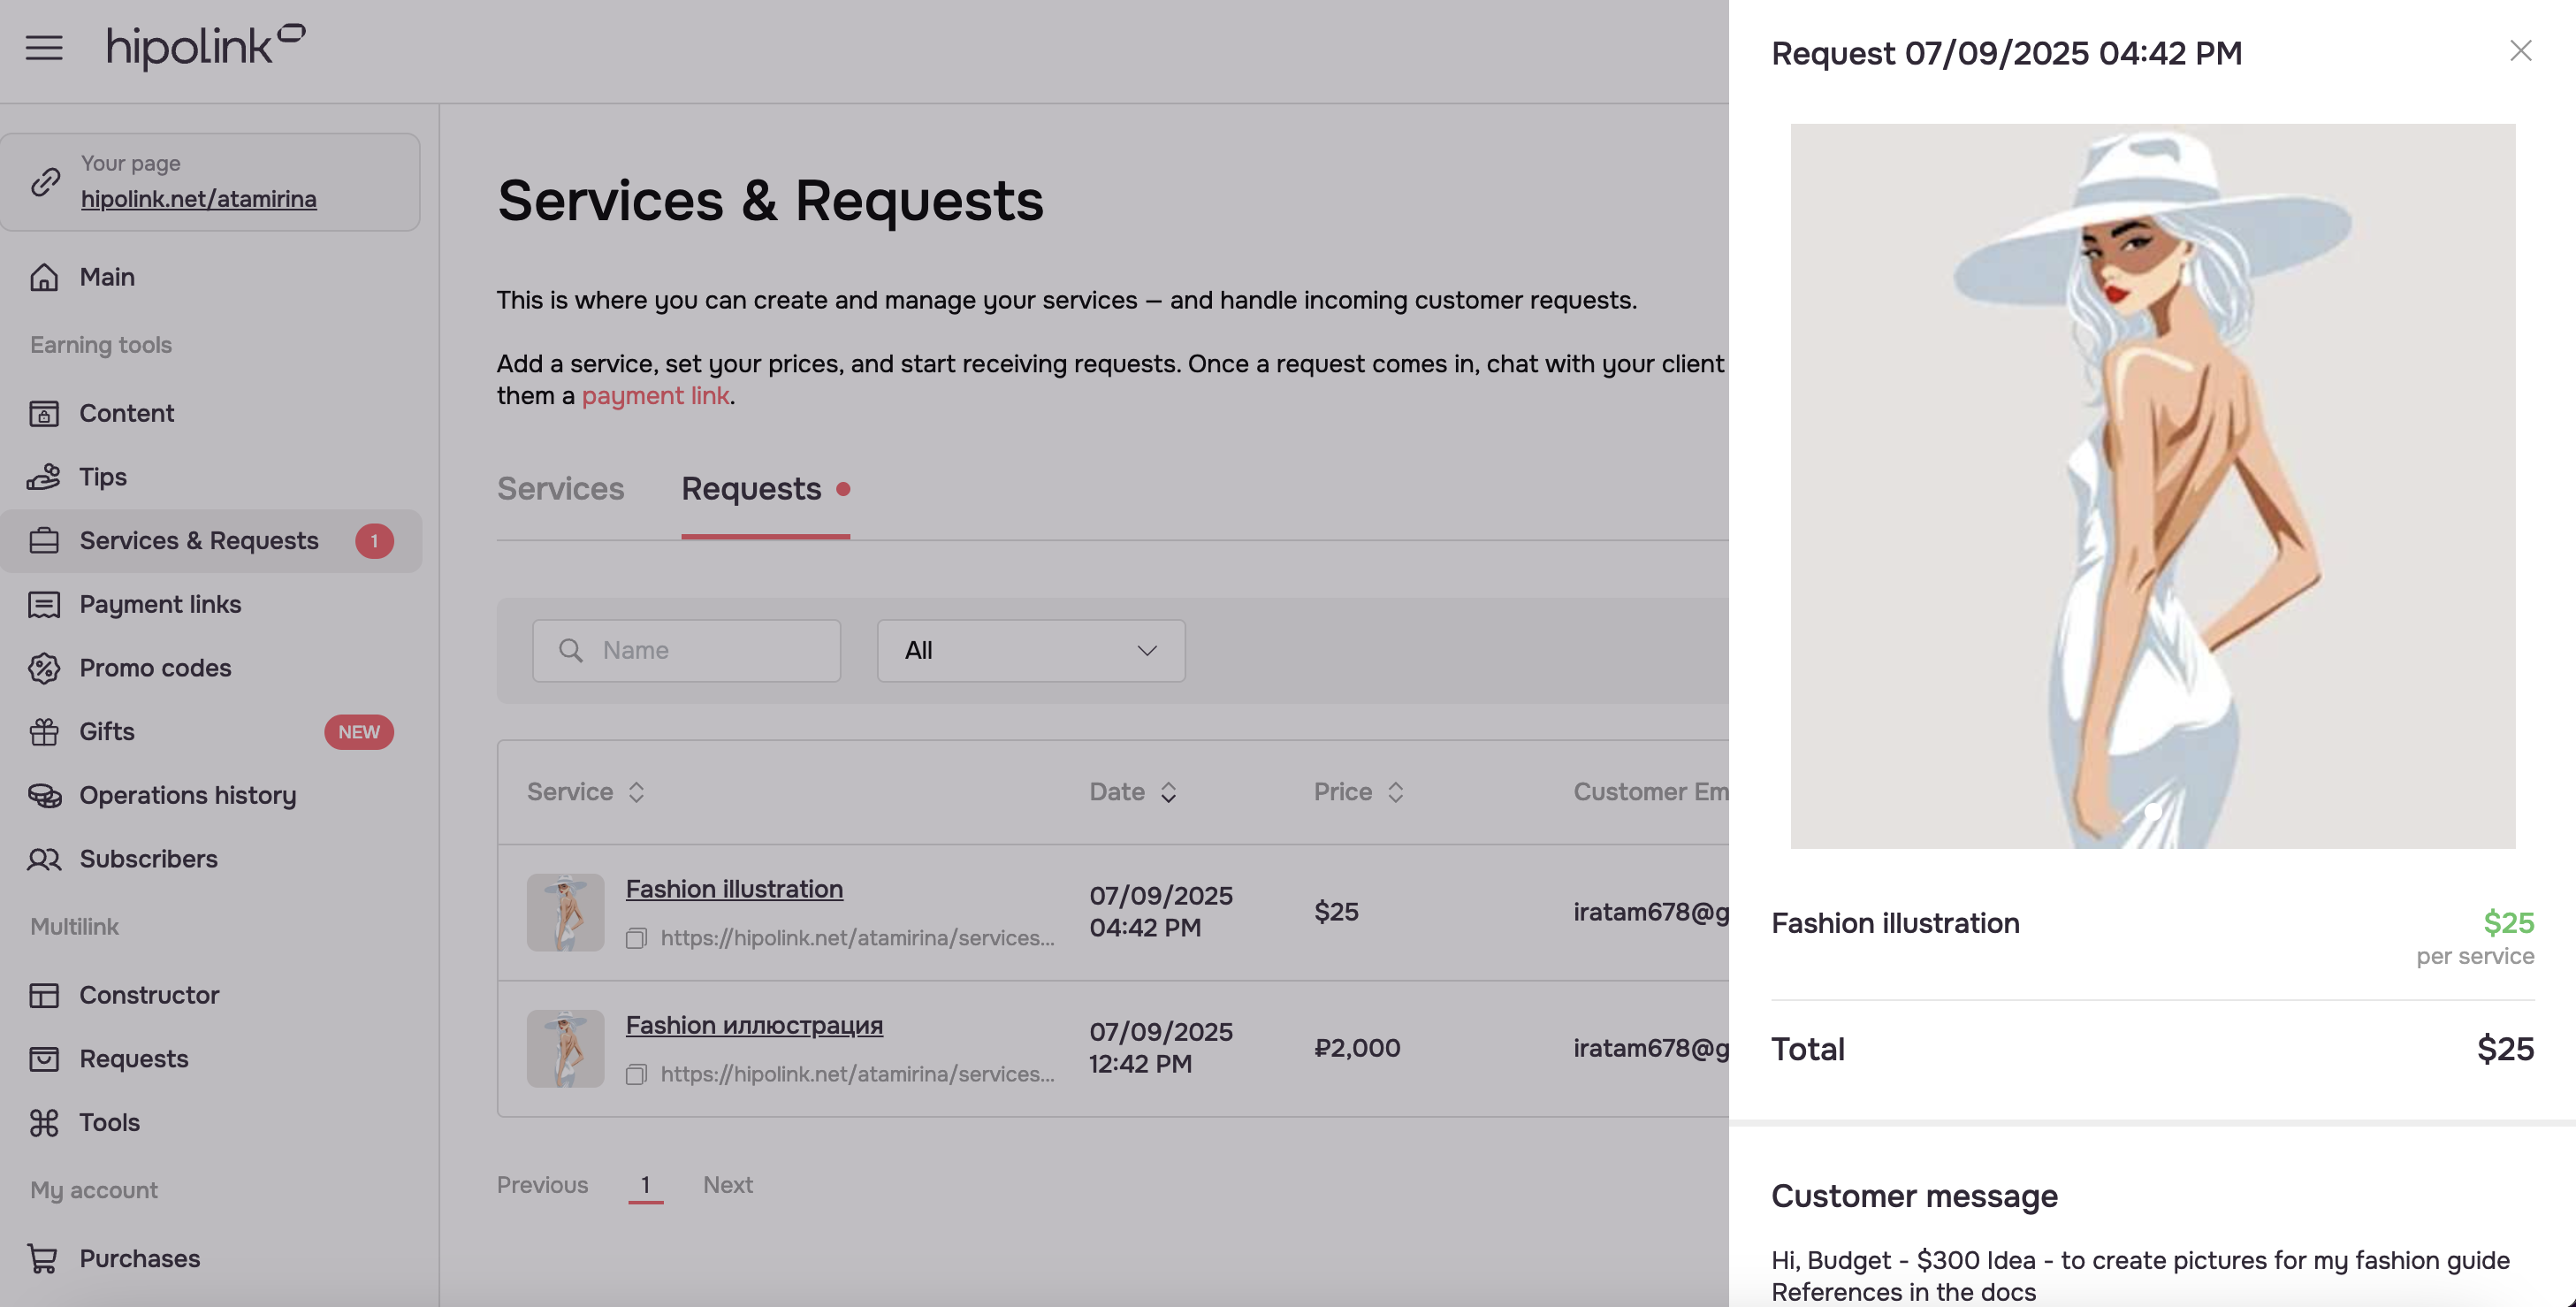
How to Accept a Client Request
Once a client submits a request, it will appear in the “Requests” section. There, you can review all the details and choose to either accept or decline the request.
Now you’re all set — go ahead and start creating your services! 🚀 Your clients are just a few clicks away.
MAIN OPPORTUNITIES
VerificationPrivate contentServices & RequestsTipsSubscription to creator updatesRegistrationEdit textWithdrawalsEdit avatarPromo CodesEdit themesEdit backgroundEdit linksGifts for TipsDropdown BlockEdit animated textEdit online-servicesIcons on buttonsEdit separatorEdit messengersEdit social networksEdit videoEdit photoEdit applications formEdit widgetsHTML blockIn this section, you can create and edit service cards. Client requests related to your services will also appear here.
How it works: Create a service, add pricing in the price list, receive requests, and clarify details with the client via any convenient messenger. Use payment links to receive payments.
How to Add a Service
Step 1. Go to the “Services and Requests” section and click the “Create Service” button.
Step 2. Fill in the service card preview and save your changes.
Step 3. The service is now successfully created and will appear in your list of services.
How the Client Sees and Orders the Service
Clients can access the service via your multi-link or a direct link. There, they’ll be able to submit a request by:
- providing all the necessary information,
- attaching files (if needed).
How to Accept a Client Request
Once a client submits a request, it will appear in the “Requests” section. There, you can review all the details and choose to either accept or decline the request.
Now you’re all set — go ahead and start creating your services! 🚀 Your clients are just a few clicks away.